Setting up a WordPress cluster for huge sites
If you have a huge site, chances are you also do a lot of data processing – imports, exports, calculations etc.
These kind of batch processing jobs that max out the CPU and disk are the mortal enemy of real-time transactions. Your web visitors demand real-time interaction and fast response from your site, so if you are running imports and maxing out your CPU and disk on the same server hosting your web traffic then your users are regularly going to encounter slowness. This leads to loss of interest from your visitors, loss of sales and loss of SEO rank.
Ultimately, to solve this, once you have exhausted scaling up, you need to architect a better solution.
Scaling Up WordPress – check before building your cluster!
If you are considering building a cluster, it means you think you can’t get more speed from a single server. If you have not yet used our Super Speedy Pack yet then you should definitely try that before building a cluster. We built our Super Speedy Pack to solve search, filtering and underlying scalability issues exhibited in WordPress and WooCommerce.
It is not uncommon for customers with large sites to get 10x or more speed boost from our Super Speedy Plugin pack so prior to building your cluster, check out our Super Speedy Plugin pack.
Scaling Out with a WordPress Cluster
You need to separate the batch processing from the realtime stuff. That means you need a minimum of 2 servers. 1 server processes all the data imports, exports, calculations, category counts, etc – the data is replicated to the 2nd server and that server serves your web traffic.
If you’re going to the bother of getting 2 servers, you’re better off going further and getting 3 servers. It’s very little extra hassle and then gives you the ability to have 3 servers online at once with no batch processing, or 1 or 2 of the servers handling batch processing and the remaining ones serving web traffic.
Using this model, you can also easily switch servers offline to upgrade them without interrupting visitors to your website. That means you can be online 100% of the time!
Note that this setup technically uses 4 servers – the 4th server being a load balancer. Instead of this server, you could use the Digital Ocean load balancer feature/server instead but I provide details below for installing this easily.
If you’re looking at building a cluster for more speed, you may find our plugin pack will help give you the speed boost you need.
Step by step guide to building your cluster
This is the guide I use to install these clusters, so hopefully it helps some of you out there who wish to go huge with your WordPress sites.
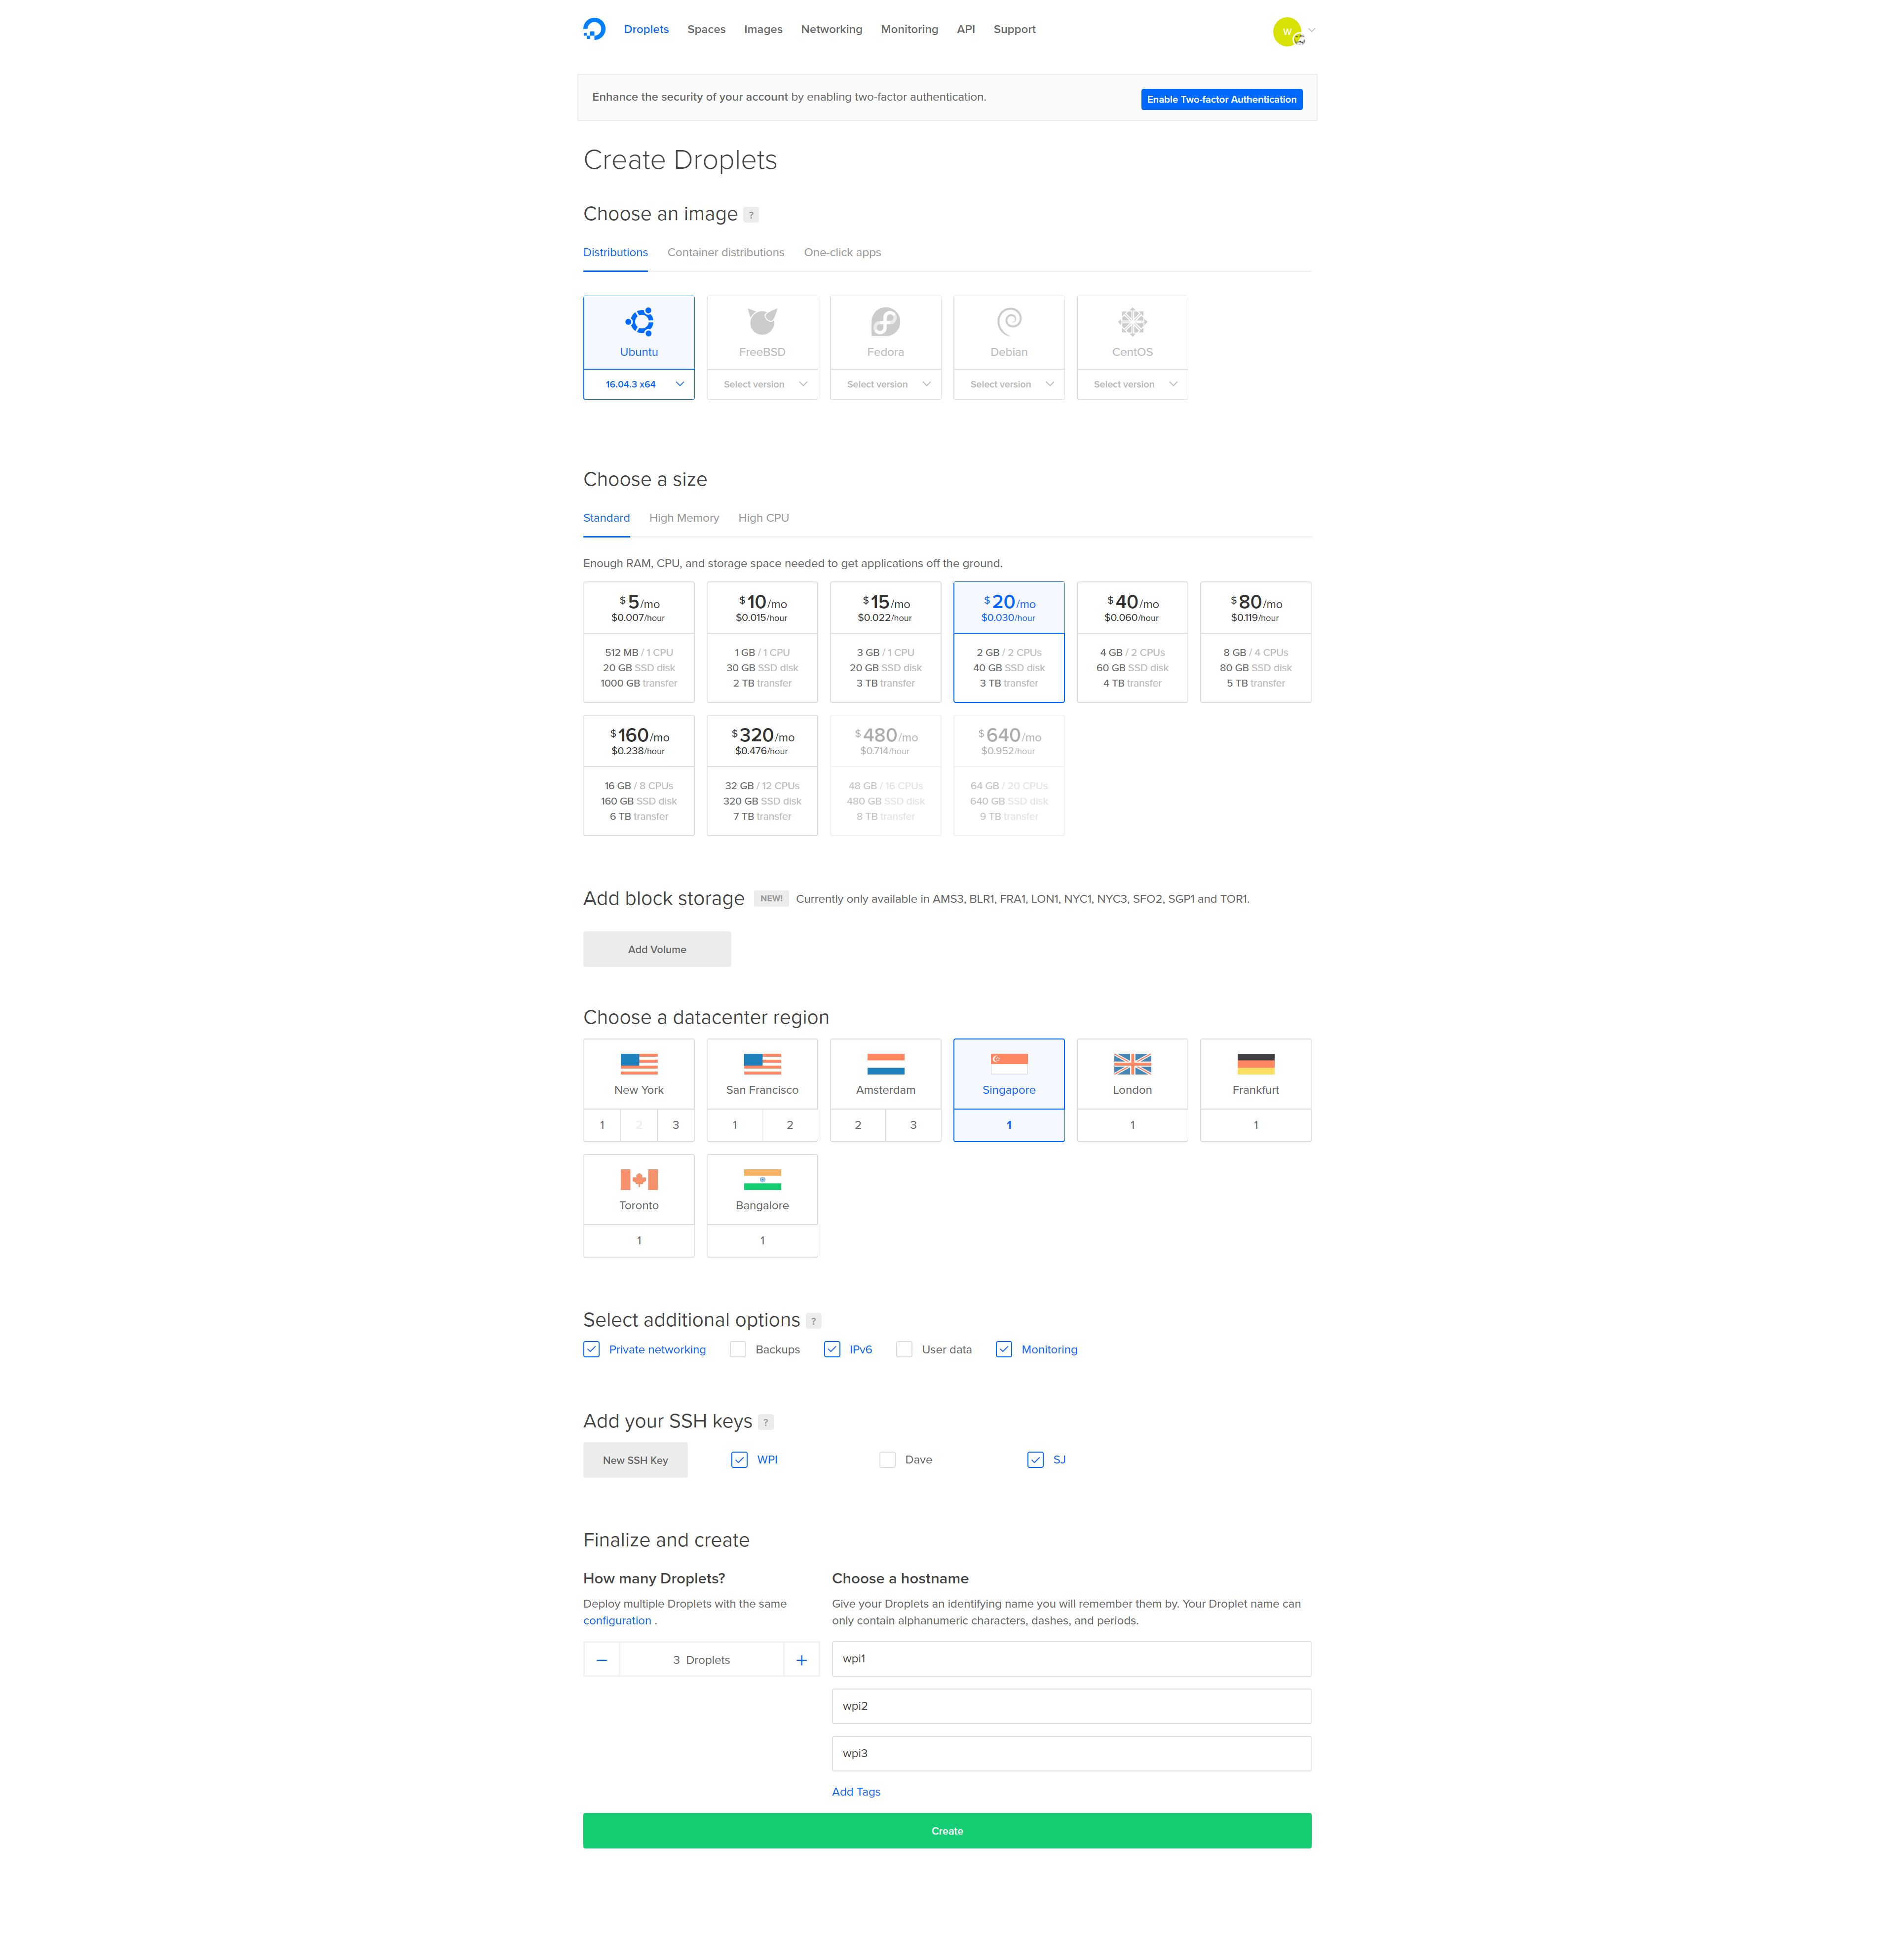
Create 3 Ubuntu 16.04 servers
I like Digital Ocean, so this guide is using their hosting, but you can use any host provided they offer private networking and Ubuntu 16.04.
Create 3 Ubuntu 16.04 (or 3 servers on any platform) – they make it easy to make multiple at once – make sure to enable private networking and add your ssh key.
Install PerconaDB XtraDB Cluster on your cluster-nodes
Log into your 3 droplets and run the following commands on each node:
wget https://repo.percona.com/apt/percona-release_0.1-4.$(lsb_release -sc)_all.deb
dpkg -i percona-release_0.1-4.$(lsb_release -sc)_all.deb
apt-get update
apt-get upgrade
apt-get install percona-xtradb-cluster-57
Note: You will be asked to enter a new root password for the cluster. To make life easier, use the same password for each PerconaDB node, or leave the root password blank and it will infer security if you log in as root and connect.
Configure private networking
We want the nodes to share data over the private network, rather than out and in from your hosting company. This prevents crazy bandwidth costs, speeds things up and improves security.
Even though private networking is already enabled, we need to be able to reliably use eth1 (rather than eth0) as the private network device.
On each node edit the grub networking file. I prefer vi to edit files, but you can use nano or even edit the files with Filezilla.
vi /etc/default/grub.d/50-cloudimg-settings.cfg
Find the line that begins GRUB_CMDLINE_LINUX_DEFAULT and alter it as follows (add net.ifnames=0):
GRUB_CMDLINE_LINUX_DEFAULT="console=tty1 console=ttyS0 net.ifnames=0"

Save the file then run the update grub command and reboot (only time I know of where you need to reboot a linux box!).
update-grub
shutdown -r now
Repeat the above for all your nodes. Then you can check config with this:
ifconfig -a
You should see the public IP address against eth0 and the private address against eth1.
You can also view each ethernet devices configuration here:
cat /etc/network/interfaces.d/50-cloud-init.cfg
The file above will already be configured if you selected private networking when you created the droplet.
Take a note of the private IP address for each of your 3 nodes. This information is also available from your Digital Ocean interface when you click through to each droplet.
You can test private networking is working by pinging the private IP address of another node from one of the nodes:
ping 10.130.45.161
Configure replication
Firstly, we need a replication user. Create this user on all 3 nodes.
Log into mysql:
mysql
or if you chose a password for your mysql server earlier, use this:
mysql -u root -p
Enter the root DB password you chose earlier then create a new user for replication purposes (choose a strong password and note it down so we can add it to the configuration files):
CREATE USER 'sstuser'@'localhost' IDENTIFIED BY 'password';
GRANT RELOAD, LOCK TABLES, PROCESS, REPLICATION CLIENT ON *.* TO 'sstuser'@'localhost';
FLUSH PRIVILEGES;
Next exit MySQL by typing ‘exit’ then hitting enter, then stop MySQL on all 3 nodes using:
service mysql stop
On node1, customise the configuration file below according to your private IP addresses and replication user password enter it into this file:
vi /etc/mysql/percona-xtradb-cluster.conf.d/wsrep.cnf
- Enter the 3 private IP addresses for wsrep_cluster_address, separated by commas.
- Enter node 1 private IP address for wsrep_node_address.
- Enter the sst password for wsrep_sst_auth.
- Change the name of the node on the line wsrep_node_name
Your file will end up looking something like this (lines in bold are the lines you need to alter from the default config):
[mysqld]
# Path to Galera library
wsrep_provider=/usr/lib/galera3/libgalera_smm.so

# Cluster connection URL contains IPs of nodes
#If no IP is found, this implies that a new cluster needs to be created,
#in order to do that you need to bootstrap this node
wsrep_cluster_address=gcomm://10.130.45.161,10.130.47.4,10.130.47.11

# In order for Galera to work correctly binlog format should be ROW
binlog_format=ROW

# MyISAM storage engine has only experimental support
default_storage_engine=InnoDB

# Slave thread to use
wsrep_slave_threads= 8

wsrep_log_conflicts
# This changes how InnoDB autoincrement locks are managed and is a requirement for Galera
innodb_autoinc_lock_mode=2

# Node IP address
wsrep_node_address=10.130.45.161
# Cluster name
wsrep_cluster_name=pxc-cluster

#If wsrep_node_name is not specified, then system hostname will be used
wsrep_node_name=pxc-cluster-node-1

#pxc_strict_mode allowed values: DISABLED,PERMISSIVE,ENFORCING,MASTER
pxc_strict_mode=ENFORCING

# SST method
wsrep_sst_method=xtrabackup-v2

#Authentication for SST method
wsrep_sst_auth="sstuser:password"
Note: You will also need to remove the # comment from the beginning of the lines with the wsrep_node_address and the wsrep_sst_auth.
Copy the contents of the file and then save it. Configure node 2 and node 3 by editing the same file on those nodes and altering 2 rows from the file above:
- Change wsrep_node_address to be the private IP address of node 2 (or node 3 for that node)
- Change wsrep_node_name to pxc-cluster-node-2 or pxc-cluster-node-3
Once you’ve done this, you’re ready to bootstrap your cluster.
Bootstrap your cluster
On node 1, run the following command:
/etc/init.d/mysql bootstrap-pxc
Check it’s running by logging into mysql and running this command:
show status like 'wsrep%';
Note: The above command can be useful in future to check for replication status – you can see things like how many items are queued to be replicated amongst other details.
On node 2 and 3, run the following:
/etc/init.d/mysql start
You now have a Percona cluster with 3 nodes replicating data to each other.
Install Nginx and PHP 7 on all 3 nodes
On each node, install Nginx and PHP 7 using the following sequence of commands:
apt-get install nginx
apt-get install php7.0
apt-get install php7.0-curl
apt-get install php7.0-gd
apt-get install php7.0-intl
apt-get install php7.0-mysql
apt-get install php-memcached
apt-get install php7.0-mbstring
apt-get install php7.0-zip
apt-get install php7.0-xml
apt-get install php7.0-mcrypt
apt-get install unzip
A faster way to run all of the above would be using this single line:
apt-get install -y nginx php7.0 php7.0-curl php7.0-gd php7.0-intl php7.0-mysql php-memcached php7.0-mbstring php7.0-zip php7.0-xml php7.0-mcrypt unzip
Install Unison for file replication
After much testing, GlusterFS is not well-suited to WordPress file-replication. GlusterFS slows down a LOT when there are a lot of files in each directory. The guide has been updated to use Unison instead. This Unison setup uses a star schema for file replication, with node 1 at the centre of the star.
node 1 <--> node 2 file replication
node 1 <--> node 3 file replication
That means a file edit on node 3 will replicate to node 1 and then to node 2. A file edit on node 1 will replicate out directly to node 2 and 3. Because of this, it makes sense to make node 1 our wp-admin server where we upload plugin files. Because of this star schema for file replication, node 1 is your most important node. If it goes down, or you switch it off, file replication will be paused until you bring it back online.
On each node, install unison:
apt-get -y install unison openssh-server
This will allow us to run the replication commands later once we have installed the WordPress files.
Configure SSH so nodes can connect to each other
SSH access is required for Unison to be able to replicate files. Run the following on all 3 nodes:
ssh-keygen
Hit enter 3 times to accept 3 defaults inc 2 blank passwords for the keyfile so it works non-interactively
Now, grab a copy of the id_rsa.pub files for each node and paste them into the other 2 nodes authorized_keys file. Find the public keys of each node by running this command:
cat /root/.ssh/id_rsa.pub
Then paste those public keys into the authorized_keys file of the other 2 nodes:
vi /root/.ssh/authorized_keys
Authenticate each node
On node 1, run:
ssh ipofnode2
ssh ipofnode3
You will be asked if you wish to trust the other node. Answer yes.
Repeat this on node 2 and node 3, connecting to the other 2 nodes.
Replicate the web folder files using Unison
Now that we have ssh authentication, we can set up Unison to replicate the website files to node 2 and 3. Run the following commands on node 1 of your cluster:
unison /var/www ssh://10.130.47.4//var/www -owner -group
unison /var/www ssh://10.130.47.11//var/www -owner -group
Note: replace the IP addresses with your own and the folder names with your own.
Since you have no files yet in /var/www these commands will complete quickly.
Now set up a crontab/cron job for Unison. Run the following command:
crontab -e
Choose whatever editor you prefer when it asks you then append the following to the end of the file:
* * * * * unison -batch /var/www ssh://10.130.47.4//var/www &> /dev/null
* * * * * unison -batch /var/www ssh://10.130.47.11//var/www &> /dev/null
Change IP addresses and folder locations. Use internal IP addresses so traffic goes over the faster internal network card.
Install WordPress files onto Node 1 only
Because we are using file replication and we already have database replication in our cluster, we only need to install WordPress onto node 1. On node 1, run the following:
wget https://wordpress.org/latest.zip -P /var/www/
unzip /var/www/latest.zip -d /var/www/
mv /var/www/wordpress /var/www/wpicluster
chown www-data:www-data /var/www/wpicluster -R
rm /var/www/latest.zip
Note: Instead of /var/www/wpicluster you could use /var/www/yourdomain.com but if you do, ensure you alter the nginx config files in the next section.
Configure Nginx to load your WordPress site on each node
I’ve created some configuration files to make this part quicker and easier. The configuration files set Nginx up to work over port 80 – later, we will add SSL to our load balancer. This reduces load on our servers since they won’t have to decrypt SSL traffic.
The configuration files here also configure the Nginx fastcgi-cache, so you don’t need to install Varnish. They’re also domain-name independent, so no configuration required.
On all 3 nodes, run the following commands:
git clone https://github.com/dhilditch/wordpress-cluster /root/wordpress-cluster/
cp /root/wordpress-cluster/etc/nginx/* -R /etc/nginx/
ln -s /etc/nginx/sites-available/wpintense.cluster.conf /etc/nginx/sites-enabled/
mkdir /sites/wpicluster/cache -p
service nginx restart
Set up your Load Balancer
Digital Ocean provide a load balancer, but with that approach you have to manually renew your SSL certificates. Plus you get less control – we want control so we can send wp-admin traffic to node 1. So follow the instructions below to set up your own load balancer.
First, create a droplet with Ubuntu 16.04 again, private networking and your SSH keys.
Then log onto your load balancer droplet and run the following commands:
add-apt-repository ppa:nginx/stable
apt-get update
apt-get install nginx
Then create a new file at /etc/nginx/conf.d/loadbalancer.conf.
vi /etc/nginx/conf.d/loadbalancer.conf
This will automatically be loaded when you restart nginx. Enter the following in the file, adjusted for your private IP addresses.
upstream clusterwpadmin {
     server 10.130.45.161;
}
upstream clusternodes {
     ip_hash;
 server 10.130.47.4 max_fails=3;
 server 10.130.47.11 max_fails=3;
}
server {
     listen 80;
# this block is for letsencrypt
 root /var/www/html;
 location ~ /.well-known {
      allow all;
  try_files $uri $uri/ =404;
 }
 server_name _;
 #return 301 https://$host$request_uri;
 location ~ /wp-(admin/|login\.php\b|cron\.php) {
     proxy_pass http://clusterwpadmin;
 proxy_set_header X-Forwarded-Host $host;
 proxy_set_header X-Forwarded-Server $host;
 proxy_set_header X-Forwarded-For $proxy_add_x_forwarded_for;
 proxy_set_header X-Forwarded-Proto $scheme;
 proxy_set_header X-Real-IP $remote_addr;
 proxy_set_header Host $host;
 }
location / {
     proxy_pass http://clusternodes;
 proxy_set_header X-Forwarded-Host $host;
 proxy_set_header X-Forwarded-Server $host;
 proxy_set_header X-Forwarded-For $proxy_add_x_forwarded_for;
 proxy_set_header X-Forwarded-Proto $scheme;
 proxy_set_header X-Real-IP $remote_addr;
 proxy_set_header Host $host;
 }
}
server {
     listen 443 ssl;
 #ssl_certificate /etc/letsencrypt/live/yourdomain.com/cert.pem;
 #ssl_certificate_key /etc/letsencrypt/live/yourdomain.com/privkey.pem;
location ~ /wp-(admin/|login\.php\b|cron\.php) {
     proxy_pass http://clusterwpadmin;
 proxy_set_header X-Forwarded-Host $host;
 proxy_set_header X-Forwarded-Server $host;
 proxy_set_header X-Forwarded-For $proxy_add_x_forwarded_for;
 proxy_set_header X-Forwarded-Proto $scheme;
 proxy_set_header X-Real-IP $remote_addr;
 proxy_set_header Host $host;
 }
location / {
     proxy_pass http://clusternodes;
 proxy_set_header X-Forwarded-Host $host;
 proxy_set_header X-Forwarded-Server $host;
 proxy_set_header X-Forwarded-For $proxy_add_x_forwarded_for;
 proxy_set_header X-Forwarded-Proto $scheme;
 proxy_set_header X-Real-IP $remote_addr;
 proxy_set_header Host $host;
 }
}
#if a user connects to yourdomain.com:9443 they will be directed to node 1. This is where admins should connect to add plugins etc.
server {
     listen 9443 ssl;
 server_name _;
 #ssl_certificate /etc/letsencrypt/live/yourdomain.com/cert.pem;
 #ssl_certificate_key /etc/letsencrypt/live/yourdomain.com/privkey.pem;
location / {
     proxy_pass http://clusterwpadmin;
 proxy_set_header X-Forwarded-Host $host;
 proxy_set_header X-Forwarded-Server $host;
 proxy_set_header X-Forwarded-For $proxy_add_x_forwarded_for;
 proxy_set_header X-Forwarded-Proto $scheme;
 proxy_set_header X-Real-IP $remote_addr;
 proxy_set_header Host $host;
 }
}

Save that file then you can restart nginx using:
service nginx restart
SaveNow, log into your DNS provider and point your new domain name at the public IP address of your loadbalancer node.
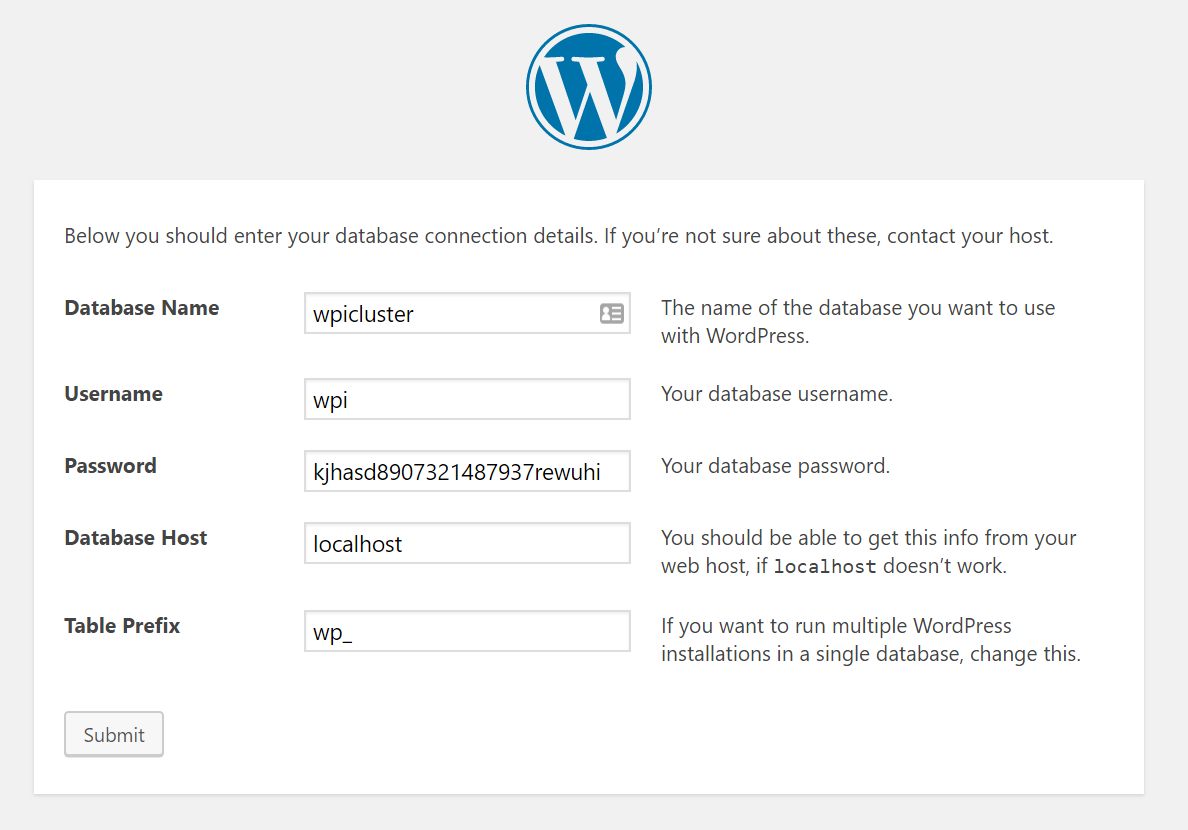
Configure WordPress
Now that we have database and file replication set up, and a load balancer, we can go about starting the 5-minute install of WordPress.
On node 1, connect to mysql using:
mysql -p (or just mysql if no root password)
Note: you’ll be asked for your password, so paste it in – right-click in putty is paste, and it’ll look like nothing happened because it’s a password field, but it does paste.
create database wpicluster;
grant all privileges on wpicluster.* to wpi@localhost identified by 'CHOOSEASTRONGPASSWORD';
Visit the URL you chose earlier for your loadbalancer, e.g. http://www.yourdomain.com.
Choose your language, then enter the database name: wpicluster, the username: wpi and the password you chose in the GRANT command above.
Set up WordPress Cron on only node 1
WP Cron is awful. It relies on users visiting your site in order to run scheduled tasks. In this case, we don’t even want scheduled jobs running on node 2 or 3, so we’ll disable wp cron across all nodes and then implement a real cron job on node 1.
On node 1, edit /var/www/wpicluster/wp-config.php. This file edit will replicate to your other nodes.
vi /var/www/wpicluster/wp-config.php
and insert the following lines somewhere:
define('WP_DISABLE_CRON', true);
if (strpos($_SERVER['HTTP_X_FORWARDED_PROTO'], 'https') !== false) {
 $_SERVER['HTTPS']='on';
}
Note: Only the first line is to disable WP_CRON. The rest is for later when we forward traffic from our load balancer and we want to ensure WordPress knows to server up static files over HTTPS if that was what the user requested.
If you’re struggling to figure out where to put this code, you can stick it after the define(‘DB_NAME’, ….); line.
This wp-config.php update will replicate out to the other nodes using GlusterFS, so you don’t need to modify this on the other nodes.
Now run:
crontab -e
And add an extra line as follows:
* * * * * wget http://yourdomain.com:9443/wp-cron.php?doing_cron &> /dev/null
Set up SSL on your load balancer
Now get your free SSL certificates from LetsEncrypt. On your load balancer node, run the following:
add-apt-repository ppa:certbot/certbot
apt-get update
apt-get install certbot
certbot certonly --webroot --webroot-path=/var/www/html -d yourdomain.com -d www.yourdomain.com
You should get a note telling you CONGRATULATIONS. It will also tell you the location the key files were saved to. Now edit the loadbalancer.conf file from earlier to set up SSL. (WordPress installation does not work well over SSL which is why we add SSL after installation)
vi /etc/nginx/conf.d/loadbalancer.conf
Uncomment the ssl_certificate (x2) and ssl_certificate_key (x2) lines and replace the path with the paths provided by the output from LetsEncrypt.
Also uncomment the line “return 301 https://$host$request_uri;”
service nginx restart
Once you have edited the loadbalancer.conf file and restarted nginx, you will have a working SSL certificate on your load balancer.
Note: At this point, if you access your website with https, some CSS will appear broken. There is one final stage we have to complete in order to fix this, which is almost the final step in the entire process.
Update your Site URL in WordPress
Log into node1.yourdomain.com. Visit the WordPress dashboard, then Settings->General.
You will see 2 domain entries, both of which are probably currently tied to your node 1 subdomain, and both of which will be http instead of https.
Replace both of these entries with https://www.yourdomain.com.
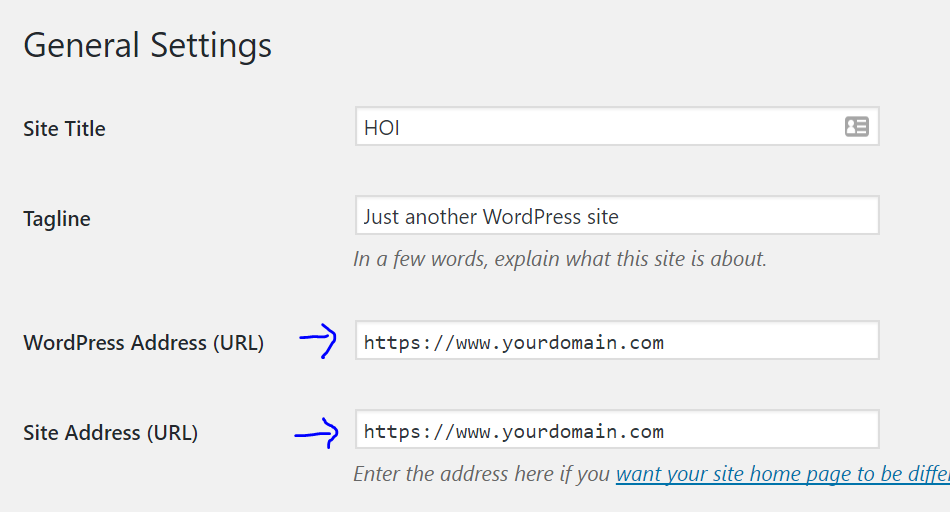
Note: Here you enter the domain name you chose for your load balancer, normally www.yourdomain.com or similar.
If you didn’t already, edit your wp-config.php file on Node 1 and just below where you disabled WP_CRON, add the following lines:
if (strpos($_SERVER['HTTP_X_FORWARDED_PROTO'], 'https') !== false) {
  $_SERVER['HTTPS']='on';
}
The traffic is being served over https to your users, but because it’s plain http on each node (between your load balancer and your nodes), you need to make sure WordPress knows it’s HTTPS so any static files are correctly loaded over HTTPS.
Go forth and conquer!
That’s it, a mammoth task complete.
You can visit wp-admin from any server, but you can also force traffic to node 1 for your own admin purposes by visiting https://www.yourdomain.com:9443/wp-admin/. With the configuration above, node 1 is never serving traffic to front-end users, so you can run all kinds of admin jobs on there without impacting slowing down user traffic.
If anyone has any questions, fire away!